FPGAの部屋

FPGAやCPLDの話題やFPGA用のツールの話題などです。 マニアックです。 日記も書きます。

FPGAの部屋の有用と思われるコンテンツのまとめサイトを作りました。ご利用ください。 http://marsee101.web.fc2.com/index.html

Windows 11 に efinity-riscv-ide-2023.2.1.1-windows-x64 をインストールする”では、Windows 11 に efinity-riscv-ide-2023.2.1.1-windows-x64 をインストールした。今回は、Ubuntu 22.04 に efinity-riscv-ide-2023.2 をインストールしよう。

Efinity IDE のダウンロード”でダウンロードした efinity-riscv-ide-2023.2.1.1-linux-x64.run をインストールする。
9f0bc711.png


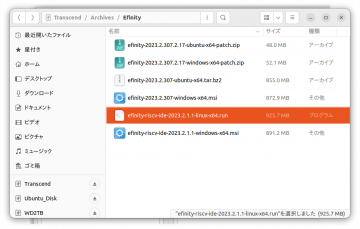
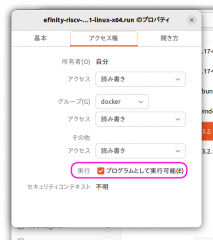
efinity-riscv-ide-2023.2.1.1-linux-x64.run を右クリックし、右クリックメニューから”プロパティ”を選択した。
実行 プログラムとして実行可能(E) にチェックが入っているので、これでよい。
c145a7ee.png


efinity-riscv-ide-2023.2.1.1-linux-x64.run を右クリックし、右クリックメニューから”プログラムとして実行(R)”を選択した。
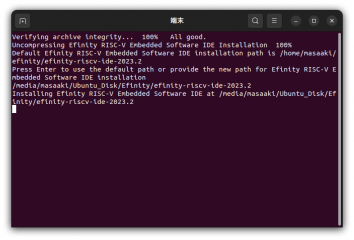
ターミナルが開いて、ベリファイや解凍が行われた。
インストール・パスを要求されたので、”/media/masaaki/Ubuntu_Disk/Efinity/efinity-riscv-ide-2023.2”を入力して、Enter キーを押した。
2c32ca8c.png


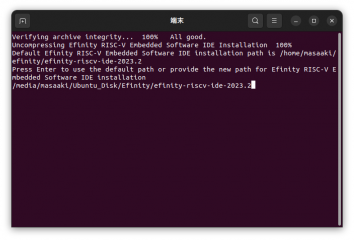
efinity-riscv-ide-2023.2 のインストールが実行された。
04993ea4.png


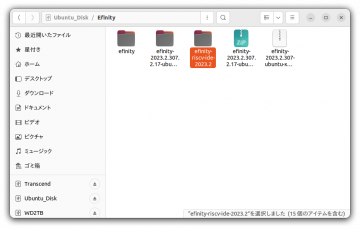
/media/masaaki/Ubuntu_Disk/Efinity/efinity-riscv-ide-2023.2 が生成された。
ea20327f.png


efinity-riscv-ide-2023.2 の内容を示す。
05d425f0.png


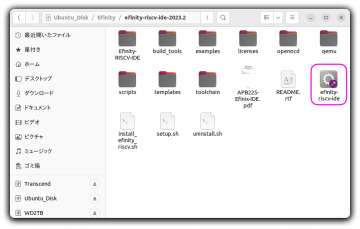
efinity-riscv-ide をダブルクリックすると、起動した。
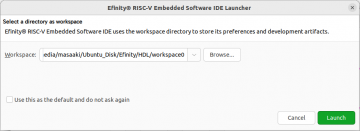
Efinity RISC-V Embedded Software IDE Launcher ダイアログが表示された。
Efinity/HDL/workspace0 ディレクトリをワークスペースに指定して、Launch ボタンをクリックした。
23e86436.png


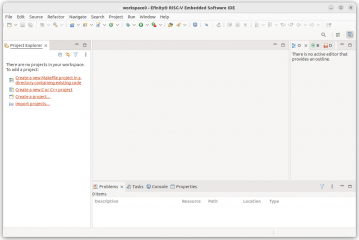
finity RISC-V Embedded Software IDE が起動した。こちらもベースは Eclipse のようだ。
460ea28c.png

Windows 11 に efinity-riscv-ide-2023.2.1.1-windows-x64 をインストールしてみよう。

Efinity IDE のダウンロード”でダウンロードした”efinity-riscv-ide-2023.2.1.1-windows-x64.msi”をインストールしてみよう。
インストールのやり方は”Sapphire RISC-V SoC Hardware and Software User Guide UG-RISCV-SAPPHIRE-v6.0 December 2023”の 11 ページの”Install the Efinity RISC-V Embedded Software IDE”に書いてあった。

efinity-riscv-ide-2023.2.1.1-windows-x64.msi をダブルクリックして、インストーラーを起動した。
897a2a6f.png


Efinity RISC-V Embedded Software IDE 2023.2 Setup ダイアログが表示された。
Welcome to Efinity RISC-V Embedded Software IDE 2023.2 Setup Wizard 画面
Next ボタンをクリックした。
8c926505.png


End-User License Agreement 画面
I accept the terms in the License Agreement にチェックを入れた。
Next ボタンをクリックした。
0ba6af79.png


Destination Folder 画面
デフォルトのパスのままが良いと思う。D: ドライブにすると問題が発生するかもしれない?
Next ボタンをクリックした。
c747c9ee.png


Ready to install Efinity RISC-V Embedded Software IDE 2023.2 画面
Install ボタンをクリックした。
eedd4b71.png


Installing Efinity RISC-V Embedded Software IDE 2023.2 画面が表示され、インストールが進んでいく。
4b1d8422.png


Completed the Efinity RISC-V Embedded Software IDE 2023.2 Setup Wizard 画面
インストールが終了したので、Finishボタンをクリックした。
938e62d6.png


Windows 11 のスタートメニューから”すべてアプリ”を選択する。
E のグループに Efinity RISC-V IDE 2023.2 があるので選択する。
27901b58.png


Efinity RISC-V Embedded Software Launcher ダイアログが起動した。
Workspace を選択して、Launch ボタンをクリックした。
8378a1db.png


Efinity RISC-V Embedded Software IDE が起動した。
38e9af1f.png

Windows 11 の Efinity で helloworld チュートリアルをやってみる4”の続き。

Efinity® Trion® Tutorial UG-EFN-TUTORIAL-v7.0 August 2022”を参照して、helloworld チュートリアルをやってみようということで、前回は、”3.5 Perform Place & Route”と”4.0 Review Results”の”4.1 Review Place and Route Results in the Floorplan Editor”をやってみた。今回は、”4.2 Use the Timing Browser”と”4.3 Use the Tcl Command Console”、それに、チュートリアルには無いが、IP Catalog を表示してみよう。

4.2 Use the Timing Browser
Floorplan を Efinity IDE に入れた。
Floorplan の Show Timing Path ボタンと Show Timing Delay ボタンをクリックした。
bb8101f7.png


View Timing Browser ボタンをクリックした。
Timing Browser が表示された。
Critical Path が表示されている。
Data Path Cell の led[4] をクリックすると FloorPlan で led[4] のセルを表示するようだ。
40074f88.png


Data Path Cell の rdata[4]~FF をクリックすると FloorPlan で rdata[4]~FF セルを表示した。
0316fa00.png


4.3 Use the Tcl Command Console
Show/Hide Tcl Command Console ボタンをクリックした。
b8c305e7.png


Console の下に Type tcl command... と表示されたボックスが表示された。この中に TCL コマンドを入力するようだ。
また、コンソール部分には、tcl 8.6 と表示されて、簡単なヘルプが表示されている。
625d11ec.png


Type tcl command... にコマンドとして source example_report.tcl と入力し、Enter キーを押した。
3916e500.png


タイミング・パスのレポートが表示された。
0203648a.png


IP Catalog の表示
IP Catalog を表示してみよう。
Open IP Catalog ボタンをクリックした。
03a00131.png


IP Catalog が表示された。
展開するといろいろな IP が表示された。
AXI Infastructures -> AXI Data FIFO を選択した。
Efinity_141_240321.png

Next>> ボタンをクリックした。
IP の設定画面が表示された。ここで、いろいろな設定を行うようだ。
0ff9e5e5.png

↑このページのトップヘ